Refund Credit
When the Customer has a credit Regular balance, a refund check may be written to them with the following procedure.
- Go to Accounting / A/R / Payments and select Add to choose the Customer who will be receiving a refund check. Alternatively, go to Accounting and choose shortcut icon to add a Payment on Account.
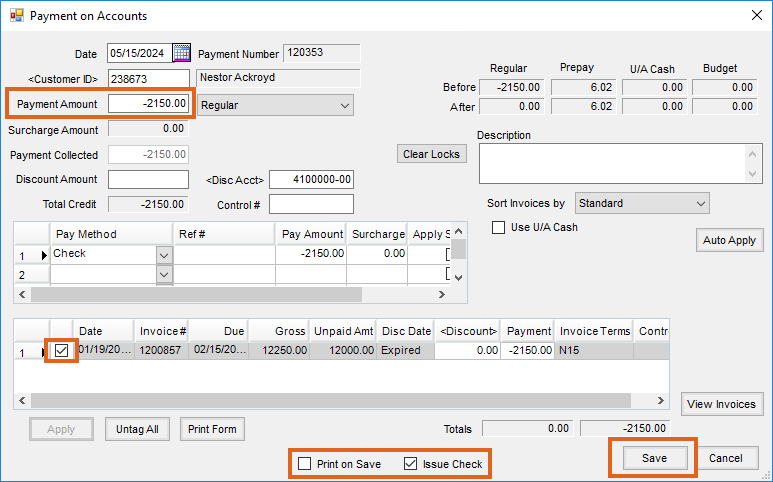
- Tag the Credit Invoice that will be used to issue the refund check.
- Enter the amount of the refund (as a negative number) in the Payment Amount field. An amount in Unapplied Cash to be refunded would also be entered as a negative number in this field.
- Select the Issue Check option at the bottom of the screen.
- To print the payment, also select Print on Save at the bottom of the screen.
- Choose Save to save the payment and view the information that will print on the check.
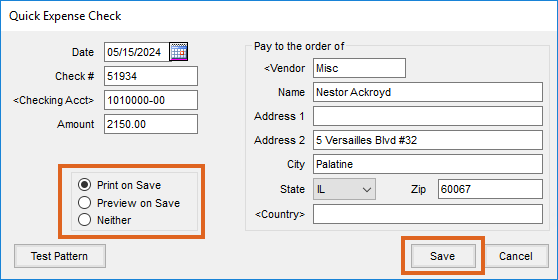
- The information on this screen will automatically populate, but, the first time using the screen, the Vendor ID must be selected by double-clicking in the data field and choosing the appropriate Vendor. The Miscellaneous Vendor is normally chosen so that all checks from this function will be in a central location. The Customer name and address are also automatically populated by Agvance. This is the information that will print on the check.
- After verifying that the check number and all other information on the check is correct, set the Print on Save option and Save.


Refund UAC
When the Customer has Unapplied Cash on account to be refunded, use the following steps to issue a check.
Start by adding a Payment for the Customer at Accounting / A/R / Payments.

- Enter a negative payment for the amount of the Unapplied Cash.
- Select Adjustment as the Pay Method in the Payment grid.
- Deselect all rows in the Invoice grid.
- Check Use U/A Cash.
- Select the Issue Check option.
- Save the payment.
The Quick Expense Check screen appears showing the Date, Check #, and Customer Name and Address. Confirm the check number and select the appropriate print option. Choose Save to save/print the check.

